

Okay, ya’ll this is the post that many of my DIY-ers/risk-takers have been waiting for! I FINALLY painted our kitchen cabinets and ‘BOY do I have some tips, tricks, and pointers to share.’
First, I will start by saying that the kitchen is one of the most important rooms in a home. Most people (not ALL but MOST) utilize their kitchen almost more than any other room. When someone is buying a home, they usually make their deciding factors based off of: square footage, backyard space, number of rooms, and the kitchen (rather is be a large space, a space that “works”, a good layout, or even updated appliances and fixtures). Because the kitchen is so expensive to renovate, people have been searching for “other ways” to get the new home look, in their favorite spot in the house, for a reasonable price!
I personally, love to host, cook, hangout, chat, and do pretty much everything in our kitchen, including crafts with our toddler (who is really into coloring and painting right now!) She also enjoys helping mommy and daddy cook as well, which was why I was skeptical about painting our cabinets white! But I could not let anything stop me anymore, I was determined to make my kitchen BRIGHT, fresh, and “new”.
Before painting our cabinets, I watched almost every single YouTube video possible. I looked up Blog post, I searched all over Pinterest, and browsed the internet for weeks to find the perfect paint, steps on how to paint cabinets, and what products I needed. One day, after work, I finally made a trip to our Home Depot store, after deciding that I was going to use the “Rust-Oleum Cabinet Kit.”
Upon arriving at the Home Depot, a worker in the paint section asked me some questions, a few being:
- Are you going to antique your cabinets? My response was no.
- Do you have more than 100 square feet of cabinets? My response was yes! We have SO many cabinets and I always like to keep extra paint around, just in case!
- Are you okay with having to prime, paint, and then top coat your cabinets? My response was, if that is what I need to do, but I am honestly looking for the easiest, fastest, and best solution!
NOTE: I am not, by any means, with this post speaking negatively or not recommended the Rust-Oleum kit to anyone (so if you are thinking of using this kit, please do not let my post discourage you).
The associate explained to me a few things about the kit that steered me away from purchasing the Rust-Oleum kit for my kitchen project:
- The kit is for people that are not familiar with painting, want a step-by-step, and who are planning to antique their cabinets (because you are paying for the product in the bundle).
- If you run out of the paint, you have the purchase another kit (which is around $70-$80) in order to get more paint, as that particular paint is only sold in the kit.
- There are other paint options that include a primer, that will eliminate the “priming” step and save time.
I was interested in what SHE thought would be the best for us. For my cabinets, I was going for a simple, white, clean look. She recommended that I use Behr Marquee paint (which is around $65 a gallon). She explained to me that it is the “BEST”, in her opinion, and that she has had wonderful feedback from others who have used it. It works as a paint, primer, and top coat (all in one), so I decided to take her advice, despite ALL of the research I had done in the past, and try it out.

{An example of what the paint can looks like that I bought}
Materials:
- 1-gallon of the Eggshell Behr Marquee paint in the ultra-pure white
- A 4-inch mini FOAM roller
- A small painting tray
- Purdy 2-1/2 in. Pro Extra Glide Angled Brush
- Cabinet cleaner (I used SAVOGRAN 1-qt. Liquid TSP Substitute Cleaner)
- Painters tape
- Screw driver (to remove hardware)
- Painters blanket or table (to line your cabinets up when painting them)
** If you are wanting to change the color of your hardware (we changed ours to black match the appliances and the fixtures) you can use a metal spray paint.**

")

Step 1:
We cleaned all of the cabinets. I used the Savogran cleaner (as directed) and a sponge cloth. We are fairly OCD about our house staying in tip-top shape, so the cabinets did not require any scrubbing, but some may need to use a rough scrubber to make sure all the dust and dirt is removed (or else it will create clumping when painted).
Step 2:
Remove all cabinets and hardware off of cabinets and tape off the walls so that you do not get paint on them. Some people put plastic around their kitchen counter top to protect them as well (we skipped over that).
**we put post-it notes above the cabinets and hardware to let us know which cabinets belong where, it would be a HUGE mess if you had to figure out where each cabinet went after painting them!**

{Remove all cabinet doors and hardware. Tape around the edges to prevent paint from transferring onto walls.}
Step 3:
Line your cabinets side by side in a garage or somewhere ventilated where they will not get dust or dirt on them and somewhere they will not get too cold (under 50°) or too hot (over 90°).
Step 4:
I started with the roller and rolled the all of the cabinets outside, backs first (let that dry) then the front. I used the paint brush to get in the edges and creases of the cabinets.
Step 5:
Paint the inside and the outside of the cabinets, without the doors. The sides are easy to do with the roller brush, but the edging and our top trim required the paint brush.

{First coat of Behr Paint (used roller for middle and paint brush for the edges.)}

{Helpful hint: when using the foam roller brush, wet it before use and then use a towel to wrap around it and squeeze the water out, this helps the paint stick on better and go on smoother!}
Step 6:
Repeat steps 4 and 5 after letting everything dry for at least 3 hours, just to make sure the paint is completely dry. We had to do 3 coats total, only because our cabinets were so dark (and because I am extremely anal).

{This is DAY 2, top cabinets complete and top hardware sprayed black.}
Step 7:
Spray your hardware and let it sit overnight. Spray paint can be tricky and if you try to use the sprayed product before it is dry, most likely it will be sticky, rub off and cause a BIG mess. Wait until the knobs are dry!
Step 8:
Screw the doors back on and then screw in the hardware for each door (even if you do not paint your hardware, you still need to remove it from the doors/drawers).
Step 9:
Touch up any areas that need to be painted and then ENJOY!
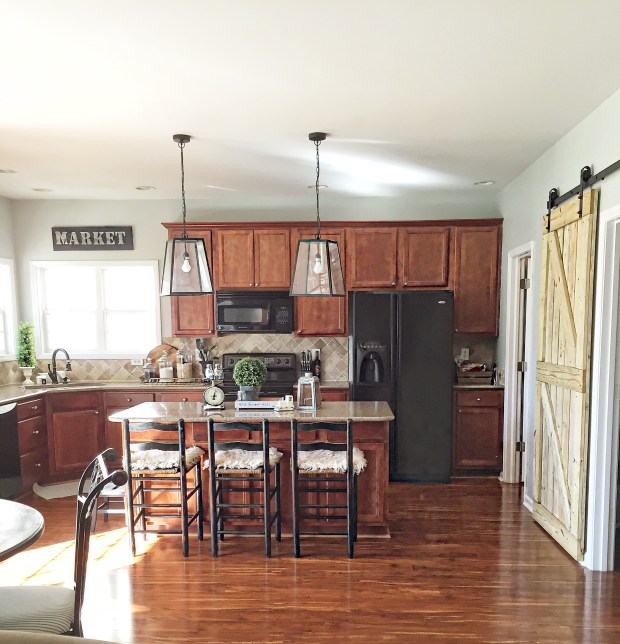
{BEFORE PHOTO}

{AFTER PHOTO}
All in all, our kitchen cabinet renovation ended up costing us a total of $90.00 (with all product included) and about 4 (almost 6 hour days) of our time.
I seriously recommend the Behr Marquee paint. I is thick, durable, and goes on smooth! It also, has a very pleasant finishing touch to it!
I hope this post helps those of you that are eager to paint your cabinets, but are discouraged or do not know where to start. I absolutely LOVE our kitchen and I am so pleased with how it turned out!
Happy Kitchen Painting!
Love,
Candice Michelle
Please note: All reviews and opinions are my own.
