

I am such a project Queen. Literally, I could make every day “project day” if life would allow me, but that’s just not realistic. So, I shoot for the weekends! This weekend, it was sunny, beautiful, and I was ready to make something new. I’ve been really focusing in on our kitchen lately. I am so torn with my cabinets right now {Do I want to paint them white? Do I want to antique them? Do I even like the knobs? Am I going to move the microwave and add a hood range?} So many questions. Not to mention, the barn door is another project I have yet to decide on {do I want to stain it dark, or light, or a medium natural stain? Do I want to antique it, or give it a distressed look?} My “mind-list” {that’s what I like to call my thought process} is getting VERY long! One thing I was and still am certain of, is that I wanted to have a pair of rustic, floating shelves on our empty wall, in the kitchen.
The kitchen is such a fun place for my family and me. We make lots of good food, we love to entertain, converse and laugh; we love to come together. Our daughter even has her own little vintage kitchen set within our kitchen. So I really want this space to be a space that we all love.
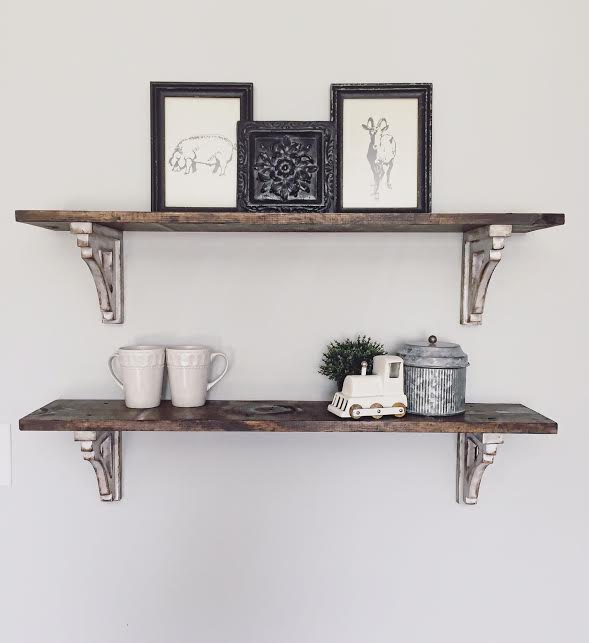
My first thought was that I wanted floating shelves, so I went to Lowe’s and had a 6 ft. cedar plank board cut in half {for the actual ‘shelf’ part}. There are various options in length sizes and widths, which is totally up to you, the space you’re working with, and how big or small you want your shelves to be. I then found these really cool, raw wood shelf holders {where all the building and fencing supplies are}. I liked these shelf holders for the look that I was going for {a very French country/cottage feel}, but there are numerous styles and options. I usually like to buy unpainted or untreated wood, this way I can make it my own without the personal touch of another.
Next, I made my supply list. I knew I needed: foam brushes {for the staining of the wood}, a paint brush {for the painting of the shelf holders}, stain {I used two different stains with this: driftwood and dark walnut}, {white} paint, screws, and a screw driver.
Time for the fun to begin! First, I put down a painters blanket, to protect the concrete outside. Then, I laid out all of my supplies and stained my wood boards (dark walnut) and stained the shelf holders (driftwood- which is a gray based stain). I let them sit out in the sun to dry before wiping the excess stain off of the wood boards and holders {you can use a rag or an old shirt for this}. It is important to not forget the wiping of the stain step, the stain will collect and get sticky if you do not do this. With the boards, you will notice that the stain not only darkens the wood, but it defines it, bringing character and charm to it.


Second step, I took my paint brush and I painted over the stain in white {only one, very thin layer} for each shelf holder. The paint takes to the stained {dry} wood very well. I let this dry in the sun for about 2 hours and then proceeded to sanding the areas that have grooves in them and the corners or edges. I then look my foam brush and swiped over these places with my darker stain {dark walnut}. This is very similar to what people would call antiquing {I love the tiny details in the wood holders, it gives the stain so many places to distribute}. I let these sit out for a bit, wiped them down in the areas that I placed the stain, going in the same direction as the stain and not being too rough, as I wanted to keep some of the darkness.


Now they are ready to hang! My fiance helped me with this part. We drilled a hole through the top of the shelf holders into the wood planks and left the side that the hangers were already set for us on the shelf holders, exposed. I decided to hang them one directly under the other, but you could really do anything with these.

The cost of these shelves total were around $60.00 {all supplies included} AND was so worth it for me. I’ve shopped around looking for shelves similar to these and cannot find them for under $200. I love the way they turned out and I hope those of you that try this, are just as pleased with yours as well!
Happy projecting!
-Candice Michelle Designs
